Installation Costs and Considerations for 10-Ton Overhead Cranes
Installation Costs and Considerations for 10-Ton Overhead Cranes
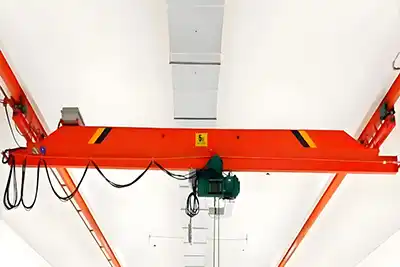
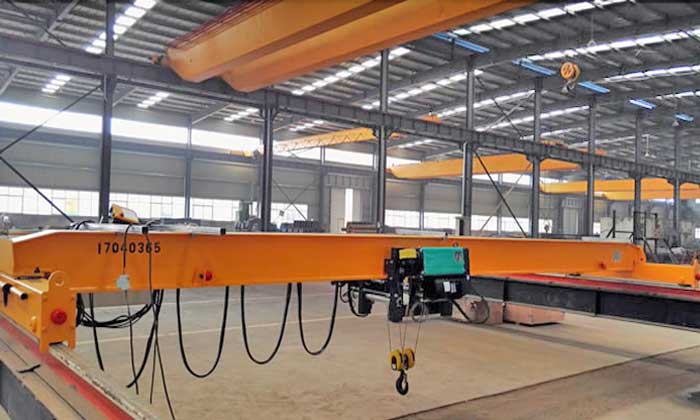
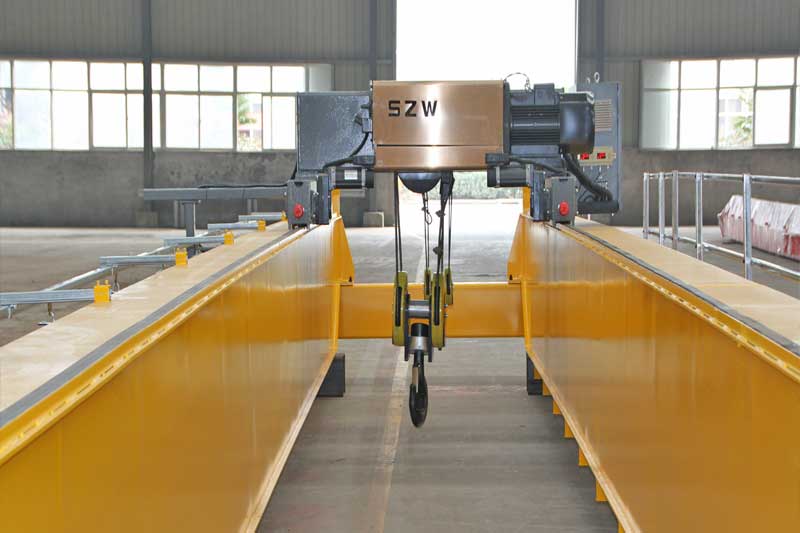
A 10-ton overhead crane is a powerful piece of machinery designed to lift and transport heavy loads within industrial and commercial settings. These cranes are commonly used in manufacturing plants, warehouses, and construction sites due to their efficiency and capability to handle large, cumbersome materials. The crane operates along a horizontal beam that moves on rails, allowing it to cover a wide area within a facility.
Proper installation of a 10-ton overhead crane is crucial to ensure safe and efficient operation. A poorly installed crane can lead to accidents, equipment damage, and operational delays, which can be costly and dangerous. Ensuring that the crane is installed correctly involves meticulous planning, precise execution, and adherence to safety standards. This not only protects the investment but also ensures the safety of workers and the longevity of the crane.
Initial Planning and Site Assessment
Site Survey and Assessment
- Structural Integrity of the Building: Before installing a 10-ton overhead crane, it is essential to evaluate the structural integrity of the building. This involves checking the building's framework, foundations, and supporting structures to ensure they can handle the additional load imposed by the crane and its operations. A professional structural engineer should conduct this assessment to identify any necessary reinforcements or modifications.
- Space Requirements: Adequate space is necessary for the installation and operation of an overhead crane. This includes considering the crane's span, height, and the area needed for safe movement of loads. The space should be free from obstructions and provide sufficient clearance for the crane to operate efficiently. Additionally, it is important to ensure that the crane can be installed without interfering with existing equipment and workflows.
- Accessibility for Equipment and Personnel: The site must be accessible for the delivery and installation of crane components. This means having suitable entry points for large vehicles and ensuring that there is enough room for assembly equipment, such as lifts and scaffolding. Furthermore, safe access for personnel during installation and future maintenance activities must be planned, including considering factors like lighting, ventilation, and emergency exits.
Preliminary Budget Estimation
Creating a preliminary budget is a critical step in the planning process. This budget should include all potential costs, such as:
Structural assessments and modifications
Crane purchase and delivery
Electrical infrastructure upgrades
Labor for assembly and installation
Testing and commissioning
Permits and compliance costs
Having a detailed budget helps in securing financing and ensures that there are no surprises during the installation process. It's advisable to allocate a contingency fund to cover unexpected expenses.
Timeline for Installation
Developing a realistic timeline for the installation is essential for smooth project execution. This timeline should outline key phases, such as:
- Initial Planning and Design: - Site assessment and planning (2-4 weeks) - Budget approval and financing (1-2 weeks)
- Procurement: - Ordering crane components (6-8 weeks) - Delivery of components (2-4 weeks)
- Site Preparation: - Structural modifications (2-4 weeks) - Electrical upgrades (1-2 weeks)
- Installation: - Assembly of crane components (2-3 weeks) - Testing and commissioning (1-2 weeks)
- Final Inspection and Handover: - Safety inspections and certifications (1 week) - Training for operators (1-2 days)
By following this timeline, project managers can coordinate with contractors, minimize disruptions to regular operations, and ensure timely completion of the installation. Regular progress reviews and adjustments to the timeline may be necessary to accommodate any unforeseen challenges.
Structural Modifications
Load-Bearing Capacity Analysis
Analyzing the load-bearing capacity of the building is a crucial first step before installing a 10-ton overhead crane. This analysis determines whether the existing structure can support the additional weight of the crane and its loads. Structural engineers assess the strength of the building's columns, beams, and foundations. If the current structure is inadequate, modifications must be made to enhance its load-bearing capacity. This analysis ensures the safety and stability of both the crane and the building.
Reinforcement of Existing Structures
- Columns: The columns in the building may need reinforcement to support the overhead crane. This can involve adding steel plates, increasing the column size, or installing additional support columns. Reinforcing columns ensures they can handle the increased load without buckling or collapsing.
- Beams: Beams that will support the crane's runway must also be reinforced. This might include installing additional beams, increasing the size of existing beams, or using stronger materials. Reinforced beams help distribute the weight of the crane and its loads evenly, preventing structural failures.
Foundation Work
- Concrete Footings: Installing concrete footings is essential to provide a stable base for the crane's support structures. These footings distribute the weight of the crane and its loads across a larger area, reducing the risk of ground settlement or movement. Properly designed and installed concrete footings are critical for maintaining the crane's stability and safety.
- Anchoring Systems: Anchoring systems secure the crane to the building's foundation, preventing any unwanted movement during operation. These systems include anchor bolts, plates, and other hardware designed to withstand the forces exerted by the crane. Ensuring that the anchoring systems are properly installed and tested is vital for the overall safety and functionality of the overhead crane.
Structural modifications are a significant part of the installation process. They ensure that the building can safely support the crane, protecting both the equipment and personnel. Budgeting for these modifications and planning them carefully helps avoid delays and unexpected costs during the installation.
Electrical Wiring and Power Supply
Power Requirements for a 10-Ton Overhead Crane
Voltage and Current Specifications:
Voltage Specifications: A 10-ton overhead crane typically operates on a three-phase power supply, which is standard for industrial equipment due to its efficiency and ability to carry higher loads. The voltage required can vary but generally ranges between 230V and 480V, depending on the crane's design and the manufacturer's specifications. It's essential to verify the voltage requirements from the crane manufacturer to ensure compatibility with the facility's electrical system.
Current Specifications: The current requirements depend on the crane's power consumption, which is influenced by factors such as the motor's horsepower and the frequency of use. It's crucial to ensure that the electrical system can provide sufficient current without causing overloads. Overhead cranes typically draw significant current, especially during peak operations like lifting heavy loads. Therefore, the facility's electrical infrastructure must be capable of handling these demands to prevent disruptions and ensure safe operation.
Backup Power Options:
Uninterruptible Power Supplies (UPS): A UPS can provide immediate, short-term power in the event of an outage. This is particularly useful for safely lowering loads and shutting down the crane in a controlled manner. UPS systems are generally battery-based and can sustain power for a limited time, making them suitable for short-term use during brief outages.
Generators: For longer power outages, a generator can provide a more extended backup power solution. Generators can be diesel, natural gas, or propane-powered and can supply power for several hours or even days, depending on the fuel supply and generator capacity. Integrating a generator with an automatic transfer switch ensures that power is seamlessly switched from the main supply to the generator, minimizing downtime.
Importance of Backup Power: Having backup power options is critical for maintaining safety and operational continuity. During power outages, the crane must be able to complete current operations or be safely shut down to prevent accidents and equipment damage.
Electrical Infrastructure Upgrades
Wiring and Conduit Installation:
Wiring Specifications: The wiring for a 10-ton overhead crane must be capable of handling high currents without overheating. This typically involves using heavy-gauge wires that meet the amperage requirements of the crane. Proper insulation and protection are essential to prevent electrical faults and ensure longevity.
Conduit Installation: Conduits protect the wiring from physical damage, environmental factors, and interference. They can be made from materials like steel, aluminum, or plastic, depending on the environment and specific needs. Properly installed conduits also help in maintaining an organized and safe workspace.
Cable Management: Good cable management practices, including the use of cable trays and supports, help in keeping the wiring organized and accessible for maintenance. It also reduces the risk of damage and electrical hazards.
Control Panel Setup:
Location: The control panel should be installed in an accessible location that provides operators with a clear view of the crane's operational are It should also be protected from environmental factors like dust, moisture, and temperature extremes.
Components: The control panel houses the controls for operating the crane, including start/stop buttons, speed controls, emergency stops, and status indicators. It may also include programmable logic controllers (PLCs) for advanced control features and safety interlocks to prevent unsafe operations.
Installation and Calibration: Setting up the control panel involves connecting it to the crane's electrical system and calibrating it according to the manufacturer's instructions. Proper calibration ensures that the crane operates smoothly and responds accurately to operator inputs.
Compliance with Electrical Codes and Standards
Local and National Codes:
National Electrical Code (NEC): In the United States, the NEC sets the standard for safe electrical design, installation, and inspection to protect people and property from electrical hazards. Adhering to NEC guidelines ensures that the electrical installation is safe and reliable.
Occupational Safety and Health Administration (OSHA): OSHA regulations require that electrical installations in the workplace meet specific safety standards to protect workers from electrical hazards. Compliance with OSHA standards helps in preventing accidents and ensuring a safe working environment.
Local Codes: In addition to national codes, local municipalities may have their own electrical codes and regulations. It's important to consult with local authorities and ensure that the installation meets all local requirements.
Safety Inspections and Certifications:
Regular Inspections: Conducting regular safety inspections of the electrical system is crucial for maintaining compliance and ensuring the ongoing safety of crane operations. These inspections should be performed by qualified electricians and include checks for wear and tear, proper grounding, and the integrity of wiring and components.
Certification: Obtaining certification from recognized authorities after installation ensures that the electrical system complies with all relevant standards and regulations. This certification may be required for insurance purposes and to meet legal obligations.
Documentation and Records:
Maintaining Records: Keeping detailed records of the electrical installation, including wiring diagrams, inspection reports, and maintenance logs, is essential for ongoing compliance and troubleshooting. These records provide valuable information for future upgrades, repairs, and audits.
Addressing the electrical requirements and infrastructure upgrades for a 10-ton overhead crane involves careful planning and execution. Ensuring adequate power supply, protecting wiring, and adhering to safety standards not only enhances the crane's performance but also ensures the safety of the facility and its workers.
Assembly of the Crane Components
Delivery and Storage of Crane Parts
Proper management of crane parts from delivery to assembly is crucial to ensure a smooth installation process and avoid any potential damage or loss.
Delivery Logistics:
Scheduling: Coordinate the delivery of crane components to coincide with the planned assembly schedule. This helps in minimizing storage time and reduces the risk of parts getting misplaced or damaged.
Transport: Ensure that the transportation method used is suitable for heavy and oversized components. This typically involves flatbed trucks for large parts and containers for smaller components.
Storage Considerations:
Storage Space: Allocate sufficient space near the installation site for storing crane components. This space should be secure, weather-protected, and easily accessible to facilitate smooth transfer to the assembly are
Protection from Elements: Parts should be stored in a dry, covered area to protect them from environmental factors such as rain, dust, and extreme temperatures. Using tarps or temporary shelters can provide additional protection.
Inventory Management: Maintain a detailed inventory of all delivered components. This includes checking off items upon arrival, inspecting for damage, and storing them in an organized manner to ensure easy access during assembly.
Assembly Process
Hoist and Trolley Assembly:
Hoist Assembly: Begin by assembling the hoist, which is the component responsible for lifting the loads. Follow the manufacturer's instructions for assembling the hoist, ensuring all bolts and connections are secure. It's important to verify that the hoist is correctly aligned and lubricated.
Trolley Installation: The trolley, which moves the hoist along the bridge, needs to be assembled next. This involves attaching the trolley to the hoist and ensuring that it moves smoothly along the designated track. Proper alignment and testing are crucial to ensure that the trolley operates without obstructions or misalignment.
Bridge and Runway Installation:
Bridge Assembly: The bridge, which spans the width of the working area and supports the trolley and hoist, is a critical component. Depending on the crane's design, the bridge may need to be assembled on-site by connecting multiple segments. Ensure that all connections are tight and secure.
Runway Installation: The runway consists of the tracks on which the bridge moves. Installing the runway involves securing the tracks to the building's support structure, ensuring they are perfectly aligned and level. Misaligned runways can lead to operational issues and excessive wear on the crane components.
End Trucks and Drive Systems:
End Trucks: End trucks are the components that allow the bridge to move along the runway. Install the end trucks at each end of the bridge, ensuring that they are properly aligned with the runway tracks. The end trucks should move smoothly without excessive friction or play.
Drive Systems: The drive system, which powers the movement of the crane along the runway, typically consists of motors, gears, and drive shafts. Install the drive system according to the manufacturer's specifications, ensuring that all components are securely fastened and properly aligned. Test the drive system to verify smooth and efficient operation.
Tools and Equipment Required
Assembling a 10-ton overhead crane requires a range of specialized tools and equipment to ensure precision and safety.
Hand Tools:
Wrenches and Sockets: For tightening bolts and nuts. A variety of sizes will be needed to accommodate different fasteners.
Screwdrivers: For securing smaller components and electrical connections.
Hammers and Mallets: For adjusting parts into place without damaging them.
Power Tools:
Drills and Impact Drivers: For creating holes and driving screws and bolts.
Grinders and Cutters: For modifying parts on-site if necessary.
Lifting and Positioning Equipment:
Cranes and Hoists: Temporary lifting devices to position heavy components during assembly.
Forklifts and Boom Lifts: For moving parts and personnel to elevated positions safely.
Measuring and Alignment Tools:
Laser Levels: For ensuring that runways and other components are perfectly level and aligned.
Measuring Tapes and Calipers: For accurate measurement of distances and component sizes.
Plumb Bobs and Spirit Levels: For vertical and horizontal alignment checks.
Safety Equipment:
Personal Protective Equipment (PPE): Hard hats, gloves, safety glasses, and steel-toed boots to protect workers.
Fall Protection Gear: Harnesses and lanyards for workers operating at heights.
Barriers and Signs: To cordon off the assembly area and alert others to the presence of heavy equipment.
Miscellaneous Equipment:
Scaffolding: For safe access to elevated parts of the crane during assembly.
Temporary Lighting: To ensure good visibility in the work area, especially if assembly takes place in low-light conditions.
Lubricants and Sealants: For ensuring smooth operation of moving parts and protecting against corrosion.
The assembly of a 10-ton overhead crane is a complex process that requires meticulous planning, skilled labor, and the right tools and equipment. By following detailed assembly procedures and using appropriate tools, the crane can be installed efficiently and safely, ensuring reliable operation for years to come.
Testing and Commissioning
Pre-commissioning Checks
Mechanical Inspections:
Structural Integrity: Inspect the crane's overall structure to ensure all components, such as the bridge, runway, hoist, trolley, and end trucks, are correctly assembled and securely fastened. Look for any signs of damage or deformation that could affect the crane's performance.
Alignment and Leveling: Verify that the runway tracks and bridge are properly aligned and level. Misalignment can lead to uneven wear, operational inefficiencies, and potential safety hazards. Use laser levels and plumb lines for precise measurements.
Lubrication and Moving Parts: Check all moving parts, such as gears, bearings, and rollers, to ensure they are properly lubricated. Proper lubrication reduces friction and wear, enhancing the crane's performance and lifespan.
Fasteners and Connections: Ensure all bolts, nuts, and other fasteners are tightened to the manufacturer's specified torque settings. Loose fasteners can lead to mechanical failures during operation.
Electrical System Verification:
Wiring and Connections: Inspect all electrical wiring and connections for correct installation and secure attachment. Look for any signs of wear, damage, or loose connections that could cause electrical faults or failures.
Control Panel Functionality: Test the control panel to ensure all controls, indicators, and safety interlocks are functioning correctly. This includes testing start/stop buttons, emergency stops, and limit switches.
Voltage and Current Levels: Verify that the voltage and current levels meet the crane's specifications. Use multimeters and other diagnostic tools to check for proper voltage and current at various points in the electrical system.
Grounding and Bonding: Ensure the crane is properly grounded and bonded to prevent electrical shocks and ensure safe operation. Check that all grounding connections are secure and comply with electrical codes.
Load Testing Procedures
Static Load Test:
Purpose: The static load test evaluates the crane's ability to handle its rated load without any movement. It helps identify any structural weaknesses or deficiencies in the crane's design.
Procedure: Position the crane at a specific location and gradually apply a load equivalent to its maximum rated capacity. Hold the load in place for a specified duration, typically 10-15 minutes, while closely monitoring the crane for any signs of deformation, instability, or mechanical failure.
Inspection Points: During the test, inspect critical components such as the bridge, runway, hoist, and trolley for any signs of stress or deformation. Also, check the integrity of the crane's supporting structures and foundations.
Dynamic Load Test:
Purpose: The dynamic load test assesses the crane's performance under actual operating conditions, including lifting, moving, and lowering loads. It ensures that the crane can handle dynamic forces and stresses during normal operation.
Procedure: Gradually apply a load, typically around 110% of the crane's rated capacity, and perform various lifting and movement operations. This includes lifting the load to different heights, moving it along the runway, and rotating the load if applicable.
Inspection Points: Monitor the crane's performance during the test, paying attention to the smoothness of operations, responsiveness of controls, and stability of the crane. Look for any unusual noises, vibrations, or operational issues that could indicate mechanical problems.
Safety Inspections
Compliance with OSHA Standards:
Regulatory Requirements: Ensure the crane installation complies with all relevant Occupational Safety and Health Administration (OSHA) standards and regulations. This includes requirements for machine guarding, electrical safety, load rating, and operator training.
Safety Features: Verify that all required safety features, such as emergency stop buttons, limit switches, overload protection devices, and warning labels, are installed and functioning correctly. These features are essential for preventing accidents and ensuring safe operation.
Documentation: Maintain detailed records of all inspections, tests, and certifications. OSHA may require documentation to verify compliance during audits or inspections.
Final Approval and Certification:
Third-Party Inspection: Engage a qualified third-party inspector or certification body to conduct a final inspection and review of the crane installation. This independent verification ensures that all installation and safety standards have been met.
Load Rating Certification: Obtain a load rating certification that specifies the crane's maximum safe working load. This certification is typically provided by the crane manufacturer or a certified inspection body and must be visibly posted on the crane.
Operator Training and Certification: Ensure that crane operators are properly trained and certified to operate the crane safely. This includes training on the crane's controls, safety features, and emergency procedures. Provide operators with a comprehensive operation manual and safety guidelines.
Handover Documentation: Compile all relevant documentation, including inspection reports, test results, safety certifications, and operator training records, and hand them over to the facility management. This ensures that all necessary information is available for future reference and compliance.
By following these detailed testing and commissioning procedures, you can ensure that the 10-ton overhead crane is installed correctly, operates safely, and complies with all relevant standards and regulations. Proper testing and certification provide peace of mind and protect both the investment in the crane and the safety of the facility and its personnel.
Budgeting for Installation Expenses
Breakdown of Costs
Structural Modifications:
Load-bearing Capacity Analysis: Costs include hiring structural engineers to analyze the building's load-bearing capacity and provide recommendations for reinforcement.
Reinforcement of Existing Structures: Expenses for reinforcing columns and beams, which may involve welding, bolting, or adding additional support structures.
Foundation Work: Costs for concrete footings and anchoring systems to support the crane, including materials, labor, and equipment rental.
Electrical Upgrades:
Wiring and Conduit Installation: Costs for purchasing and installing heavy-gauge wiring and protective conduits, as well as labor for electricians.
Control Panel Setup: Expenses for the control panel, including the cost of components, installation, and calibration.
Compliance and Safety Measures: Costs for ensuring the electrical system meets local and national codes, including inspection fees and possible upgrades.
Assembly and Labor:
Delivery and Storage: Costs associated with transporting and storing crane components before assembly.
Assembly Process: Labor costs for assembling the hoist and trolley, bridge and runway, and end trucks and drive systems. This includes hiring skilled workers and any necessary equipment rentals.
Tools and Equipment: Purchase or rental costs for tools and equipment required for the assembly process.
Testing and Commissioning:
Pre-commissioning Checks: Costs for mechanical inspections and electrical system verification, including labor and diagnostic tools.
Load Testing: Expenses for conducting static and dynamic load tests, including any special equipment or third-party services required.
Safety Inspections: Costs for ensuring compliance with OSHA standards, obtaining final approval and certification, and any necessary safety upgrades.
Miscellaneous Expenses:
Permits and Licenses: Fees for obtaining necessary permits and licenses for the installation.
Training: Costs for operator training and certification, including training materials and instructor fees.
Insurance: Additional insurance coverage for the installation period to protect against potential risks and liabilities.
Cost-saving Strategies
Bulk Purchasing of Materials:
Economies of Scale: Purchasing materials such as wiring, conduits, fasteners, and lubricants in bulk can reduce unit costs. Coordinate with other projects or departments to increase order sizes.
Supplier Negotiations: Negotiate bulk purchase discounts with suppliers. Establishing long-term relationships with suppliers can also result in better pricing and favorable payment terms.
Negotiating with Contractors:
Competitive Bidding: Solicit bids from multiple contractors to ensure competitive pricing. Compare not only the cost but also the scope of services, experience, and reliability.
Fixed-price Contracts: Consider fixed-price contracts to avoid unexpected cost overruns. Clearly define the scope of work and expectations to prevent disputes and additional charges.
In-house Capabilities: Utilize in-house maintenance or engineering teams for certain tasks to reduce reliance on external contractors, provided they have the necessary expertise and certifications.
Contingency Planning
Allocating Funds for Unexpected Expenses:
Contingency Fund: Set aside 10-20% of the total budget as a contingency fund to cover unexpected expenses such as additional materials, unforeseen structural issues, or delays.
Flexible Budgeting: Develop a flexible budget that can be adjusted as needed. Regularly review the budget throughout the installation process to identify any deviations early.
Adjusting the Budget as Needed:
Regular Monitoring: Conduct regular budget reviews and compare actual expenses to the projected budget. This helps in identifying variances and taking corrective actions promptly.
Prioritizing Expenses: Prioritize essential expenses over discretionary ones. If unexpected costs arise, consider delaying non-critical upgrades or features until additional funds are available.
Documentation and Reporting: Maintain detailed records of all expenses and changes to the budget. Transparent documentation aids in accountability and provides a clear record for future reference.
By carefully planning and budgeting for the installation of a 10-ton overhead crane, you can manage costs effectively and ensure the project is completed on time and within budget. Implementing cost-saving strategies and contingency planning further enhances financial control and prepares you for any unexpected challenges that may arise during the installation process.
Selecting Qualified Contractors
Selecting the right contractor is crucial for the successful installation of a 10-ton overhead crane. The process involves evaluating their experience, certifications, and the quality of their proposals.
Criteria for Selecting Contractors
Experience with Overhead Cranes:
Specialized Knowledge: Ensure the contractor has specific experience with overhead crane installations. This includes familiarity with different crane models, assembly processes, and the unique challenges associated with heavy lifting equipment.
Project Portfolio: Review the contractor’s portfolio to see previous overhead crane projects. Look for projects similar in scale and complexity to your own. Experienced contractors are more likely to anticipate potential issues and provide effective solutions.
Technical Expertise: Contractors should demonstrate a thorough understanding of structural, mechanical, and electrical aspects of crane installations. Their team should include skilled engineers and technicians specialized in these areas.
Licenses and Certifications:
Professional Licenses: Verify that the contractor holds all necessary licenses required by local and national regulatory bodies. This ensures they are legally authorized to perform the work and meet industry standards.
Certifications: Look for certifications from recognized industry organizations such as the Crane Manufacturers Association of America (CMAA), Occupational Safety and Health Administration (OSHA), and the American Society of Mechanical Engineers (ASME). These certifications indicate a commitment to quality and safety.
Insurance Coverage: Confirm that the contractor has adequate insurance coverage, including general liability and workers' compensation. This protects you from potential liabilities in case of accidents or damages during the installation process.
Evaluating Contractor Proposals
Comparing Quotes:
Detailed Breakdown: Ensure each proposal includes a detailed breakdown of costs for labor, materials, equipment, and any additional services. This transparency allows for a more accurate comparison between different contractors.
Scope of Work: Compare the scope of work outlined in each proposal. Make sure it covers all aspects of the installation, including site assessment, structural modifications, electrical work, assembly, testing, and commissioning. Ensure there are no hidden costs or excluded services.
Timeline: Evaluate the proposed timelines to ensure they align with your project schedule. Consider the contractor’s ability to meet deadlines without compromising on quality.
Checking References and Past Projects:
Client References: Request and contact references from previous clients. Ask about their experience with the contractor, including the quality of work, adherence to schedules, communication, and problem-solving abilities.
Site Visits: If possible, visit past project sites to see the contractor’s work firsthand. This provides a better understanding of their craftsmanship and attention to detail.
Reputation: Research the contractor’s reputation within the industry. Look for reviews and ratings on industry websites, forums, and social medi A contractor with a strong positive reputation is more likely to deliver satisfactory results.
Contract Negotiation and Terms
Defining the Scope of Work:
Comprehensive Details: Clearly define the scope of work in the contract, including all tasks, responsibilities, and deliverables. This helps avoid misunderstandings and ensures both parties are aligned on expectations.
Milestones and Deadlines: Establish project milestones and deadlines. Include provisions for regular progress updates and inspections to ensure the project stays on track.
Payment Terms:
Payment Schedule: Agree on a payment schedule that reflects project milestones. This could include an initial deposit, progress payments, and a final payment upon successful completion and inspection.
Holdbacks and Retainage: Consider including a holdback or retainage clause, where a percentage of the payment is withheld until the project is completed to your satisfaction. This provides leverage to ensure all work is finished correctly.
Warranties and Guarantees:
Workmanship Warranty: Ensure the contract includes a warranty on workmanship. This guarantees that any defects or issues arising from the contractor’s work will be addressed at no additional cost within a specified period.
Manufacturer’s Warranty: Verify that the contractor provides the manufacturer’s warranty for all crane components and parts. This protects you against defects in materials and equipment.
Liability and Insurance:
Liability Clauses: Include clauses that define the contractor’s liability in case of accidents, damages, or delays caused by their actions. This protects you from potential legal and financial risks.
Insurance Verification: Require the contractor to provide proof of insurance coverage before commencing work. Ensure their policy covers all aspects of the project, including any subcontractors they may hire.
By carefully selecting and evaluating contractors, and clearly defining contract terms, you can ensure a smooth installation process for your 10-ton overhead crane. This approach minimizes risks, ensures high-quality workmanship, and helps maintain the project’s budget and schedule.
Ensuring Compliance with Safety Standards
Safety is paramount when installing and operating a 10-ton overhead crane. Ensuring compliance with relevant safety regulations and implementing best practices is essential for preventing accidents and ensuring the well-being of workers.
Relevant Safety Regulations
OSHA Requirements:
Occupational Safety and Health Administration (OSHA): Familiarize yourself with OSHA regulations pertaining to overhead crane operations, outlined in standards such as 29 CFR 1910.179 and 29 CFR 1926.550. These standards cover aspects such as crane design, inspection, operation, and maintenance.
Load Ratings: OSHA requires cranes to be clearly marked with their rated load capacity. Operators must not exceed this capacity, as overloading can lead to structural failure and accidents.
Training Requirements: OSHA mandates that crane operators receive proper training and certification to operate the equipment safely. Additionally, maintenance personnel should receive training on inspection and maintenance procedures.
Industry Best Practices:
Crane Manufacturers’ Recommendations: Follow the recommendations and guidelines provided by crane manufacturers. These include maintenance schedules, inspection procedures, and operational guidelines specific to each crane model.
Professional Associations: Stay informed about industry best practices by engaging with professional associations such as the Crane Manufacturers Association of America (CMAA) and the Material Handling Industry (MHI). These organizations provide resources, training programs, and updates on safety standards and regulations.
Regular Safety Audits and Inspections
Scheduled Inspections:
Routine Maintenance Checks: Conduct regular inspections of the crane and its components as per the manufacturer's recommended schedule. This includes visual inspections for signs of wear, lubrication checks, and testing of safety features.
Annual Inspections: Schedule annual inspections by qualified inspectors to assess the crane's overall condition and compliance with safety standards. These inspections may include load testing, electrical checks, and structural evaluations.
Documentation and Record-Keeping:
Inspection Logs: Maintain detailed records of all inspections, including dates, findings, and corrective actions taken. This documentation serves as evidence of compliance with safety regulations and helps identify recurring issues.
Repair and Maintenance Logs: Keep records of all repairs and maintenance performed on the crane and its components. Documenting these activities ensures that the crane remains in optimal working condition and minimizes the risk of accidents due to equipment failure.
Training for Operators and Maintenance Staff
Operator Training:
Formal Training Programs: Provide comprehensive training programs for crane operators to ensure they understand safe operating practices, load handling techniques, and emergency procedures.
Hands-on Training: Offer hands-on training sessions where operators can practice operating the crane under supervision. This allows them to familiarize themselves with the controls and gain practical experience in different operating scenarios.
Certification: Ensure that crane operators receive proper certification from accredited training providers. Certification validates their competence and ensures they have the necessary skills to operate the crane safely.
Maintenance Staff Training:
Technical Training: Train maintenance personnel on crane inspection, troubleshooting, and maintenance procedures. Provide them with the knowledge and skills required to identify and address mechanical, electrical, and structural issues.
Safety Protocols: Emphasize the importance of safety protocols and procedures during maintenance activities. Ensure that maintenance personnel are aware of potential hazards and take appropriate precautions to mitigate risks.
Continuing Education: Encourage ongoing education and training for both operators and maintenance staff to stay updated on new technologies, regulations, and best practices in crane safety and operation.
By prioritizing safety and compliance with relevant regulations, you can create a safer work environment and minimize the risk of accidents during the installation and operation of a 10-ton overhead crane. Regular inspections, proper training, and adherence to industry standards are essential for maintaining safety and preventing costly accidents and injuries.
Avoiding Unexpected Costs and Delays
Unforeseen costs and delays can disrupt the installation process and inflate project expenses. Implementing proactive measures to identify and mitigate risks, maintaining effective communication, and conducting regular progress reviews are essential for minimizing unexpected challenges.
Risk Assessment and Management
Identifying Potential Risks:
Site-Specific Hazards: Conduct a thorough risk assessment of the installation site to identify potential hazards such as uneven terrain, overhead obstructions, and proximity to other structures.
Equipment Failures: Anticipate the possibility of equipment failures or malfunctions during the installation process. Ensure contingency plans are in place to address such situations promptly.
Weather Conditions: Consider how weather conditions such as high winds, rain, or extreme temperatures could impact the installation timeline and safety. Plan accordingly and implement measures to mitigate weather-related risks.
Risk Mitigation Strategies:
Contingency Planning: Develop contingency plans to address potential risks and minimize their impact on the project. Allocate additional resources, such as time and budget, to handle unexpected challenges.
Safety Protocols: Implement strict safety protocols to minimize the risk of accidents and injuries during the installation process. Provide appropriate personal protective equipment (PPE) and enforce safety procedures at all times.
Quality Assurance: Ensure that materials, equipment, and workmanship meet quality standards to reduce the likelihood of defects or rework, which can lead to delays and additional costs.
Effective Communication and Project Management
Stakeholder Engagement:
Clear Communication Channels: Establish clear lines of communication between project stakeholders, including contractors, suppliers, and internal teams. Ensure that everyone understands their roles, responsibilities, and project objectives.
Regular Updates: Provide regular updates on project progress, milestones, and any potential issues or challenges. Encourage open communication and collaboration to address concerns promptly.
Project Management:
Experienced Project Manager: Assign an experienced project manager to oversee the installation process and coordinate activities. The project manager should have strong leadership skills and experience in managing complex construction projects.
Detailed Planning: Develop a detailed project plan that outlines key milestones, timelines, and resource requirements. Identify critical path activities and prioritize tasks to minimize delays and optimize resource allocation.
Conflict Resolution: Anticipate potential conflicts or disputes that may arise during the installation process and develop strategies for resolving them quickly and amicably. Foster a collaborative environment where issues can be addressed constructively.
Regular Progress Reviews and Adjustments
Monitoring and Evaluation:
Progress Tracking: Monitor project progress against the established timeline and milestones. Use project management tools and software to track tasks, deadlines, and resource utilization.
Performance Metrics: Establish key performance indicators (KPIs) to measure project performance and identify areas for improvement. Regularly review KPIs to assess progress and make adjustments as needed.
Quality Control: Conduct regular quality inspections to ensure that work is being performed according to specifications and standards. Address any deviations or deficiencies promptly to prevent rework or delays.
Adaptability and Flexibility:
Change Management: Anticipate changes to project scope, schedule, or budget and develop a formal change management process to address them. Assess the impact of proposed changes and obtain approval from relevant stakeholders before implementation.
Resource Allocation: Be prepared to reallocate resources as needed to address emerging priorities or challenges. Flexibility in resource management helps ensure that critical tasks are completed on time and within budget.
By proactively identifying and addressing potential risks, maintaining effective communication and project management practices, and conducting regular progress reviews, you can minimize the likelihood of unexpected costs and delays during the installation of a 10-ton overhead crane. These proactive measures help ensure a smooth and successful installation process, ultimately saving time and money while enhancing project outcomes.
Conclusion
Installing a 10-ton overhead crane requires careful planning, meticulous execution, and a commitment to safety and compliance. As you embark on this endeavor, it's essential to keep key considerations in mind to ensure a successful outcome.
Recap of Key Considerations
- Safety First: Prioritize safety at every stage of the installation process. Adhere to relevant safety regulations, conduct thorough risk assessments, and provide comprehensive training for operators and maintenance staff.
- Budgeting and Cost Management: Develop a detailed budget that accounts for all installation expenses, including structural modifications, electrical upgrades, labor, and testing. Implement cost-saving strategies and contingency plans to mitigate unexpected expenses and delays.
- Qualified Contractors: Select experienced and reputable contractors with a track record of successful crane installations. Evaluate proposals carefully, check references, and negotiate contract terms to ensure clarity and accountability.
- Compliance with Standards: Stay informed about relevant safety regulations and industry best practices. Conduct regular inspections and audits to ensure compliance and address any issues promptly.
- Effective Communication and Project Management: Foster open communication among project stakeholders and employ effective project management practices. Regularly review progress, adapt to changes, and address challenges proactively to keep the project on track.
Installing a 10-ton overhead crane is a complex undertaking that requires collaboration, expertise, and attention to detail. By following best practices, prioritizing safety, and working with qualified professionals, you can ensure a smooth and successful installation process.
A successful crane installation not only enhances operational efficiency but also contributes to a safe and productive work environment. It enables businesses to optimize material handling processes, improve workflow, and ultimately, achieve their operational goals.